Student Enrolments are a crucial function of any SMS (Student Management System). In this article, we will go through the process of enrolling a student into a course.
TABLE OF CONTENTS
- Course Selection
- Student Profile
- Employer Details
- Enrolment Details
- Units
- Events
- Unit Outcomes
- Unit Fees
- Payments
- Confirmation
Alert
You will need to have your Curriculum set up before starting this process.
It is recommended that you have a party profile already created for the student that you wish to enrol.
There are multiple ways to enrol a student into a course, the most straightforward way is via Enrolments → Enrol Student.

Search for the party profile of the student that you would like to enrol. Once you have found their party profile, click on the Enrol button next to their name.
Note
Alternatively, you can create a party profile to enrol by clicking on the Create New button.
We will go through each step of the process in this article and explain each page. Clicking on the Next button on any page will take you to the next step in the process.

Alternatively, you can click on the Confirm Now button to quickly enrol the student into the course without entering all details.
Using the Confirm Now button will attempt to complete the enrolment process instantly, but if any details are missing then you will be asked to fill them in before the enrolment can be completed.
Course Selection
The first step is the Course Selection page. Find the course that you would like to enrol the student into and select it using the radio button to the left.

You can also use the Search bar or a Filter to find a specific course.

Next is the Student Profile page. This will display any compliance details that have been entered in the student’s party profile under Compliance → AVETMISS.

Warning
Ensure that all entered information is correct before proceeding. The information recorded in this area is reported to the government, and incorrect data can cause issues at the time of submission
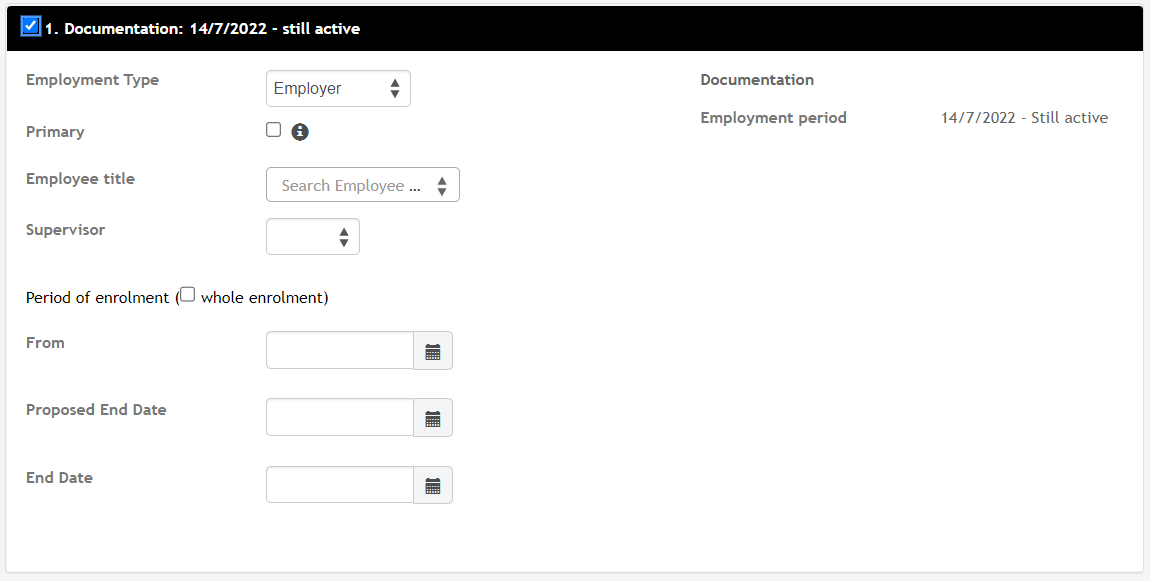
Employer Details
If the student is enrolling into the course with assistance from their Employer, you can attach them to the enrolment if they have been added to the system as a Company.
Use the search bar to find the company and select them from the list. Click on the Add button to attach them to the enrolment.

You can also enter specific employee details when attaching the employer to the enrolment.
Enrolment Details
The Enrolment page is where you can set specific details for the enrolment. There will be a few tabs separating the different categories of information for the enrolment.

Note
Note: There might be other tabs on this page, this depends on what features you have enabled.
- Course Details: Specific details for the enrolment. Some details will be inherited from the course level by default, but they can be changed for the enrolment if needed.
- Trainee/Apprentice: If the student is a Trainee or Apprentice, you can enter the specific details in here.
- Claims/Funding: Any funding details related to the enrolment should go in this section. You can also apply a contract to the enrolment if you have those set up.
Units
The Units page is where you can confirm the units that the student will be enrolled in. Core Units cannot be changed, but you can select the Elective Units that will be in their enrolment by checking the box next to each unit you would like to include.

You also select Stream Units to include if they are present and enter Additional Units into the enrolment if desired.

Events
The Scheduling page is where you can add the student to any events that are tied to the course. Events will need to be set up for the course prior to starting the enrolment process for them to appear on this page.

Unit Outcomes
The Outcomes page allows you to edit the details for the student’s units before they are enrolled into the course. This can be useful if the student has requested any Credit Transfers before starting the course.

Unit Fees
On the Fees page, you can select the Unit Fees that the student will be invoiced for upon enrolment. This only applies if you have fees set up for any units in the course.
Note
The Fees page will only be accessible if there are fees for units that are in the course. The Fees tab also needs to be enabled at the course level.

Payments
The Payment page allows you to set a Payment Option for the student if they have been set up for that course. Selecting a Payment Option on this page will create an invoice upon enrolment creation.

Confirmation
The last page will have you confirm all the major details for the enrolment before it is created. You may see some AVETMISS warnings, they will not prevent you from creating the enrolment but should be addressed soon as they can lead to problems with reporting.

Double check that all the details on this page are correct before clicking on the Create button.
You have now enrolled the student into the course.
Additional Reading
Here is some additional information on enrolments and curriculum: